Publish Kindle Books… Because there is a lot of information to cover, I’m splitting this post into 3 parts, so I can give my fingers a break from typing and your eyes a rest from reading (and absorbing all the information – there is a LOT!).
If you’ve been with me for a while, you’ll know that I embarked on a self-publishing course back in July 2014. The course was run by two great guys, Chandler Bolt and James Roper. Together they formed Self-Publishing School (now called SelfPublishing.com).
Now it’s just Chandler holding the fort down, with some pretty amazing people supporting him.
My first book through their system was published, launched, and was sitting at #148 in the Top Free Best Sellers Kindle Store.
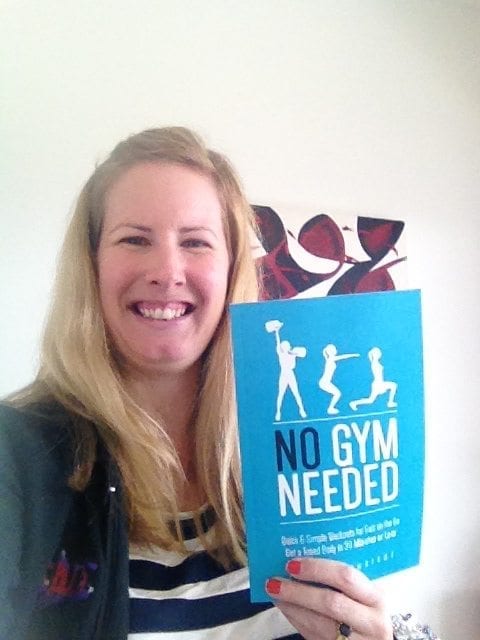
During the launch phase, the book was in a free promo period and in 24 hours I had over 1850 downloads of No Gym Needed: Quick & Simple Workouts for Gals on the Go — then this happened. To say I was super excited is an understatement!
I hit #1 in the Women’s Health category about 5 hours into the launch, and the book has held that position so far! But now we’re getting ahead of ourselves!
This 3-part blog post series is going to break everything down so you can see the process I went through, from writing, editing to publishing; all within 6 weeks!
The course was designed to run for 3 months, but I followed exactly what the guys recommended to a ‘T’ and was able to get my book happening a lot faster, plus I write about 1200 words an hour, so that helped things along!
But, that’s enough blabbing! Here’s the goss…
Table of Contents
Publish Kindle Books: Here’s What I’m Going to Cover:
- Picking a niche
- Writing the right (write?!) way
- Editing 101
- Cover and book design
- KDP uploading
- Pre-Launch tips
- Launch marketing
Ok, let’s get straight into it!
Picking a Niche
When I entered Self-Publishing School, I already had a book published on my site here at Hustle & Groove. I (naively) thought that I would simply repurpose this book and I’d be away laughing. So not the case.
As we got stuck into picking and validating a niche, it became clear to me that this book, in its current state, wasn’t a good fit for the Amazon Kindle store.
How did I arrive at this decision?
Let’s break it down a bit so you can see how it works.
Step 1 – Choose a topic
If you have no idea what you want to write about, watch the video on how to find a topic below.
Pro Tip: Use Publisher Rocket to help you find a profitable book idea!
Step 2 – Validate your topic
This is where you can quickly see whether the topic you’ve chosen is a good idea. If you didn’t watch the video above, make sure you do, as it hints at one of the ways to validate your idea – as a starting point.
Just in case you missed the subtle hint in the video, you can quickly validate your topic by visiting the Amazon Kindle store, checking out the Best Sellers, and navigating to where your book idea would sit in the categories shown.
If you see similar books (in the category shown) to your topic idea, then this is the first green light. Look for at least 3 similar books in the top 20-40 spots.
But don’t stop there, you need to validate your idea further. To do this, in Self-Publishing School we used a great tool called KindleTrend – we got access to this tool as part of the course, but you can get memberships starting at $17.
Now, I use Publisher Rocket to validate my book ideas. It’s a slicker platform and provides a lot more information. You can check Publisher Rocket out here and watch their free training videos.
I also took things a step further and purchased Kindle Spy – I find this tool really helpful to quickly see what the top 20 Best Sellers are making from a money viewpoint, and it also provides you with a quick word cloud of what the top 20 Best Sellers are using in their titles and subtitles.
Between these three options, I was able to validate my new book idea and discard my current book (as it stands) from a Kindle perspective.
Once you’ve gone through this process, you move into the writing process, which includes a heck of a lot of mind mapping first!
Writing the Right (Write?!) Way
Before you start writing, you need to figure out what you’re going to write! It’s not enough to have just picked a book topic and then start writing, you need to solidify what you’re going to write about, too!
Here are the steps to take BEFORE you start to even write!
Step 1 – Mind Map
I know there are plenty of mind mapping tools available, but to be honest, I found that putting pen to paper ‘released’ the flow of ideas more so than using an online tool or app. So I would highly recommend that you do this too.
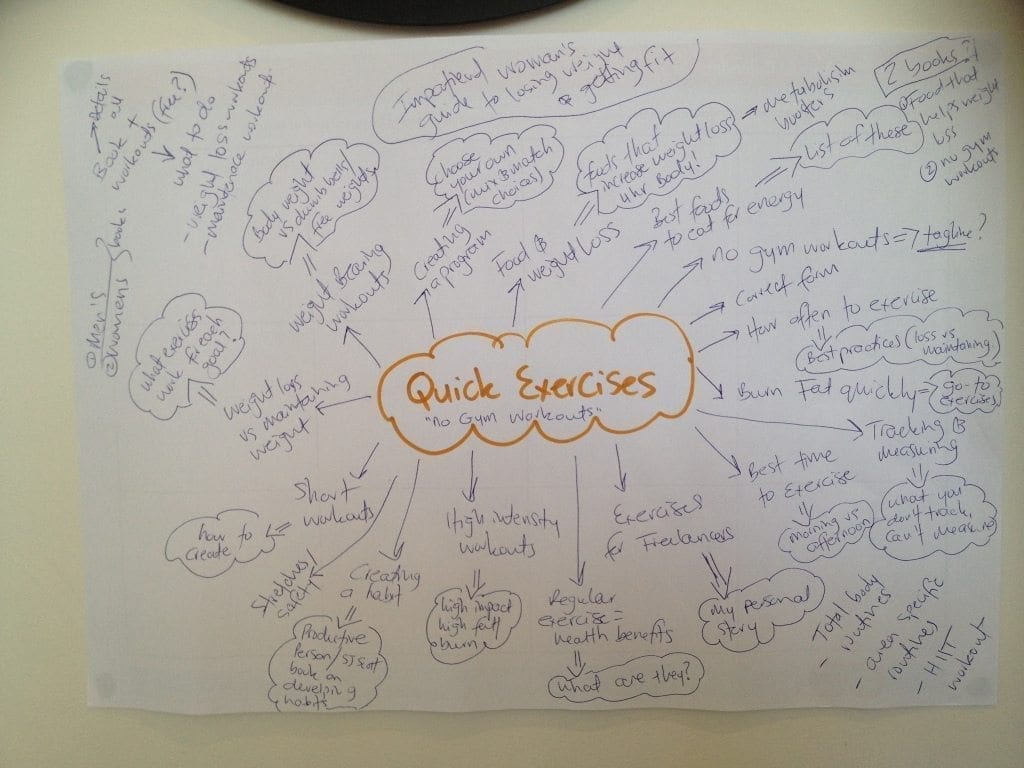
I used a large piece of poster-sized paper and went nuts about my topic, which started out as ‘No-Gym Workouts’.
I put that topic in the middle of the page, used a couple of different coloured markers and went crazy with my writing. I had bubbles of ideas all over the place, as you can see from the image below!

Take a couple of days to do this. I spent a good two hours on this the first day, left it for 12 hours or so and then came back to it and added even more.
Step 2 – Organise Similar Ideas
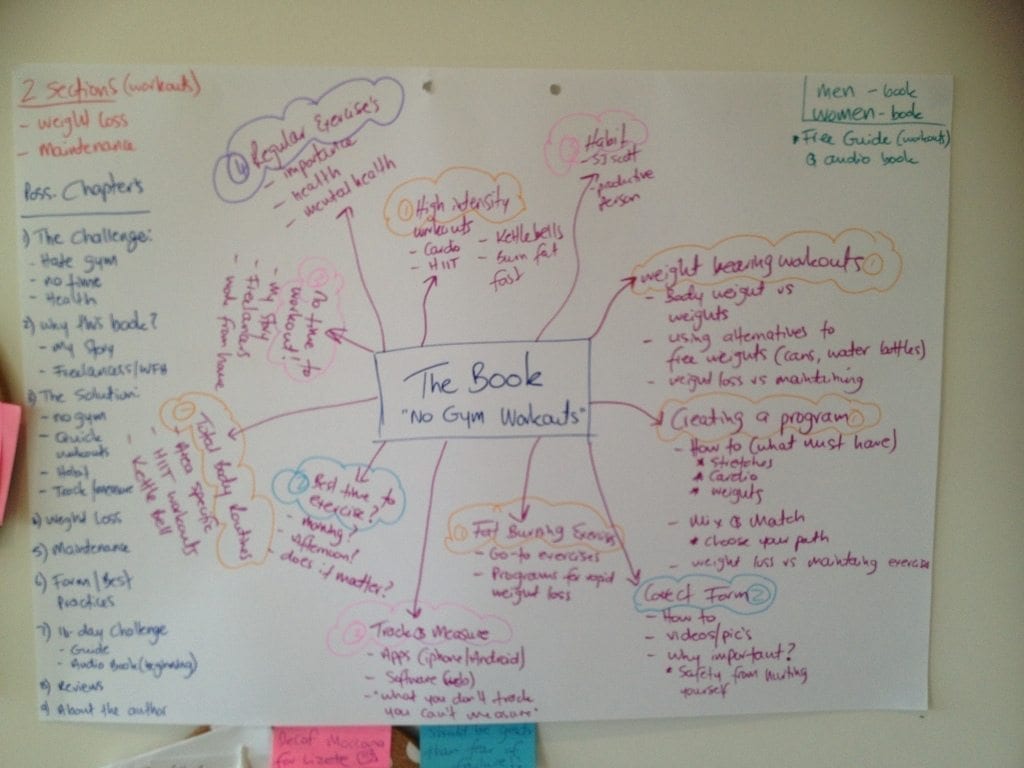
Once you’ve got your initial mind map, you want to organise your ideas a bit more. I took another poster-sized piece of paper and grouped similar ideas together and started to form chapter ideas.

I found it quite easy to go from my initial mind map to this one and come up with chapter titles.
Although at this point, I wasn’t looking at them as chapter titles, I was just looking at them as similar ideas – you should aim to do the same.
Step 3 – Outline Book
Once you’ve been through the mind mapping phase, you’re now ready to outline your book, organise your chapters and start writing!
I used Evernote to outline my book and I also used it to capture research and further ideas about the book. I scanned my mind maps and added them to Evernote as well, so I could use my iPad as my second screen while I was writing. It helped to be able to view my ideas during the writing phase in this way.
I took my second mind map and started organising the ideas into chapters in Evernote. I wrote a high-level outline and then I created notes within the Evernote notebook I created for this project, for each chapter, adding further details here, such as what research I needed to do for that chapter, what images I would need, links etc.
It’s important to note that throughout the self-publishing course, the guys said that we only needed to dedicate an hour a day, 7 days a week to writing our books to get it done within the 3-month timeframe.
I took that on board and scheduled 1 hour of time into my calendar every weekday. On average though, I would have spent 1.5-2 hours during the week on my book and about 2-3 hours over the weekend.
That was the bonus of having my own freelancing business – I can choose to organise my day how I want!
Ok, now that the book is outlined, you’re well and truly ready to begin the writing phase. Follow my tips below to make sure that you’re writing the right (write!) way.
Write What You Know First:
For me, the topic I choose to write about was something that I personally had experience with, but because it was also health and fitness related, I knew that I’d need to do a bit of research. So I choose to write the chapters that I knew I could get out quickly, without too much effort first.
I’d recommend you do this as well because it helps you to start and it also makes you feel good knowing that the book has started to take form.
Writing can be a bit of a mental issue at times, so I find that if I start with the easy wins, it sets me up to write better.
Mind Map Chapters:
I solely attribute this tip to the guys in Self-Publishing School – as you write, mind map each chapter as you go and then write that chapter completely before moving onto the next.
So how this looks is say you started at chapter 1 – you would sit down for about 12-15 minutes, mind map that entire chapter, organise your ideas and then write that chapter.
By doing it this way, your ideas are fresh and your first draft begins to take life much more quickly than if you mind map all the chapters first and then come back and start writing them individually.
Research Each Chapter:
Similar to the mind map chapters tip above, I also only researched each chapter as I got to it. This process made sure that content and information was fresh in my mind and allowed me to write using my own words because the information was fresh in my head.
This is definitely one of the reasons why I feel I can write as fast as I can because I only focus on what I need to write about at that point in time.
The same goes for when I write blog posts – I only research and read about each topic as I’m DOING.
Stick To A Deadline:
Give yourself a deadline to finish your first draft. Inside the BSBS, the guys gave us 4 weeks to write our first draft. I wanted to get mine done faster than that, so I set myself the task of finishing my first draft within 3 weeks. I completed it within 2.5 weeks.
This is how I got my book done in 6 weeks because I got through the first draft quickly.
This doesn’t mean you write crap though; it just means that I didn’t get hung up on things like adding links or images, I just made notes along the way to come back to that stuff in the second draft.
Use Scrivener:
If you don’t know what Scrivener is, you’re missing out! It is the only tool I’ll EVER use to write a book with, regardless of whether I’m writing fiction or non-fiction.
It’s by far the BEST writing tool out there and it will save your life when it comes time to publish to the Kindle platform!
Scrivener allows you to structure your book in a way that makes complete sense and it has a lot of great features that make it the best writing tool out there.
Whatever you do, DO NOT use MS Word. Scrivener allows you to access it for free for 30 times. That’s 30 accesses, not 30 days, so you can definitely get away with using it for free for a while if you’re boot-strapping! But at $45, it’s a definite bargain.
Literature and Latte, the guys that developed the tool, provide loads of videos about how to use it, so I won’t go into too much detail here.
It’s a bit of a learning curve, as it’s not like MS Word or other word processing software, but it IS well worth the couple of hours it takes to learn enough to get you started!
And that’s enough for this post! In Part 2, I’m going to talk about the editing process and cover and book design. Make sure you keep an eye out for that next week!
Don’t forget, you can grab the FULL PDF guide to this entire shebang! Enter your details below and you’ll get the Writing & Publishing Guide delivered straight to your inbox.
You can still pick up the book right now!


23 replies to "How to Easily Publish a Kindle Book in 6 Weeks – Part 1"
Hi Lise,
Thanks for that wonderful article and insights how to publish an eBook. Especially the time frame is surprising me. Additionally, there are many books which are teaching the same and I have read some of them. I didn´t thought that you can actually have such big success with it, as you have. Well done!
When I am ready to write a book I will definitely take that course. *I love courses*
Sebastian.
No problem at all Sebastian! Once you understand how Amazon works and how to market properly, the rest is pretty easy. I’m a fast writer, which is why it didn’t take as long to write, and hand on my heart – this is all my own work 😉
[…] blog series I’m writing on my experience with publishing on the Kindle platform. If you missed part 1, be sure to check it out otherwise a lot of this post won’t make much […]
Annelise, thanks so much. I definitely made some mistakes with my first book and this info is an awesome help improve my second attempt and subsequent attempts.
You’re welcome Sharyn – I’m glad you are finding them useful 🙂 The whole trick to Kindle is to keep testing and tracking what you do so you can see what works and what doesn’t!
[…] series I’ve written on my experience with publishing on the Kindle platform. If you missed part 1 and part 2, be sure to check them out otherwise a lot of this post won’t make much […]
Hi Lise,
The cover of the book looks very interesting. Where did you made it? I will need to find designer for my next book.
Thank in advance for your recommendation.
Hi Santel, thanks for your comment. The cover was designed by a professional designer, Ida. Her website is http://www.idafiasveningsson.se/ – she is brilliant!
Thank you. I will look for her.
[…] you’ve been receiving the OFS Newsletter for any length of time, you’ll know that I started my self publishing side hustle in July 2014 and that I’m seeing some great […]
Hello Sister Lise,
I want to thank you for this wonderful article, i have no knowledge what so ever about writing and publishing. Nevertheless i have this heavy burden to publish not only my writings but that of others, i try shaking it off but it wouldn’t go. I have come to realise by all indications that, that is one of the things if not the main thing i have to give my life attention to. While i am searching the net to find articles and materials to help me have foundational knowledge of how to start, of all that i have read so far, without any exaggeration and without any hypable yours has inspired me the most.
I please want you to help me better understand of what it entails to be a publisher for that matter.
Thanks
Hi Isaac, thanks so much for your message. My book, Side Hustle Blueprint: How to Make an Extra $1000 per month Writing eBooks is your best place to start, I cover everything in there to get you started on finding the right niche through to publishing and launching your book. You can find it located here: https://hustleandgroove.com/SideHustleBlueprint2
Hi lise , did you think self publishing school with chandler bolt was worth the money? $600 seems a lot for a course…
Hi Heidi, thanks for your comment. Yes, absolutely, Chandler’s school is well worth the money, I went in at the Master’s level and I’ve made back my investment well and truly. The course will work for ANYONE that puts in the effort and follows the system 🙂
Thanks very much,I am very inspired, today I must start my writing again!!!
You’re more than welcome Robert! Good luck!
[…] forward to July 2014 when I started my Kindle self publishing journey. I published my first Kindle book in September 2014 and since then, have published a further 5 […]
[…] example, writing non-fiction books is a skill that comes easily to me. I don’t have to put a lot of effort into writing books […]
[…] This is when you should be reaching out to an editor (and yes, you absolutely need one, don’t fight me on this!). You should also be engaging a cover designer, and deciding on your launch plan. […]
[…] Write a Book […]
[…] Write a Book […]
[…] Write a Book […]
[…] of you already know that I started my own ebook journey over 5 years ago, where I started learning aggressively how to make money writing ebooks and self-publishing […]