
So you’ve decided to run with WordPress for your website. Congratulations, you’ve made a great decision and myself and other WordPress lovers applaud you on your business smarts.
But, now that you’ve got it, you have no idea how to get it up and running. You’re smart and you know how to Google stuff to find an answer, but it’s so overwhelming the amount of information that’s available.
Take a deep breath, relax and let ‘Aunty Lise’ guide you through setting up your WordPress website with this “Tutorial Thursday” post!
Table of Contents
Step-by-Step WordPress Tutorial
In this post I’m going to show you how to pick a theme, what the ‘bare minimum’ pages are and what plugins you should implement to ensure your website is all set for ongoing success.
#1: Installing WordPress on Your Hosting Account
This will largely depend on your hosting account, but most providers like Hostgator, SiteGround and Bluehost have a one-click install process.
You just need to make sure that your domain name is now sitting on your hosting account, so let’s start with that first.
[bullet_block style=”size-16″ small_icon=”11.png” width=”” alignment=”center”]
- Log into your domain provider and locate your domain details (this could be Godaddy or Namecheap)
- Look for the DNS or name servers section, open this area
- Click ‘edit’ so that we can change the name servers
- Using the name servers from your hosting account (Hostgator, SiteGround etc), update the name services on your domain to these ones
- Click ‘save’ and wait for the name servers to be updated. Should take no more than a few hours, but can take up to 24 hours, so wait for the confirmation from your domain registrar.
[/bullet_block]
The screenshot below shows you where to find your domain DNS settings in Godaddy.com:

The image below shows you where you can find your name servers on SiteGround.com:

Once you’ve received confirmation that the name servers have been updated, it’s time to log into your hosting account and install WordPress.
If you’re hosting provider doesn’t have a quick installation for WordPress, reach out to their help desk and have them install it for you. Most providers will do this free of charge.
In SiteGround, you can access the WordPress installation via the cPanel. Once inside, look for auto-installations and then click on the WordPress option.
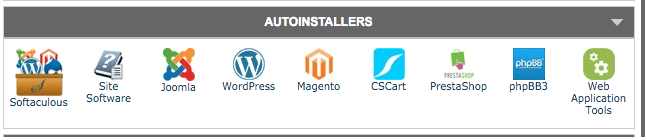
From there, just follow the instructions that are provided and make sure that you write down the username and password that you either choose or are assigned, as you’ll need these to log into the wp-admin area of your site.
Ok, now that WordPress is installed, it’s time for all the fun to begin!
#2: Choosing a WordPress Theme
Choosing a WordPress theme can be daunting, because there are literally hundreds upon thousands of options available.
There are loads of free and premium themes available and if you’re serious about starting off your side hustle right, then you’ll trust me and opt for a premium theme.
The free themes are pretty good, but they lack customisation and you’ll find yourself limited and frustrated within a few months, wishing you’d installed a premium theme!
But, I know there will be those of you who want the option to install a free theme, so below are my top five recommendations.
Top five free themes:
[bullet_block style=”size-16″ small_icon=”11.png” width=”” alignment=”center”]
- WordPress standard themes (already installed on your site by default)
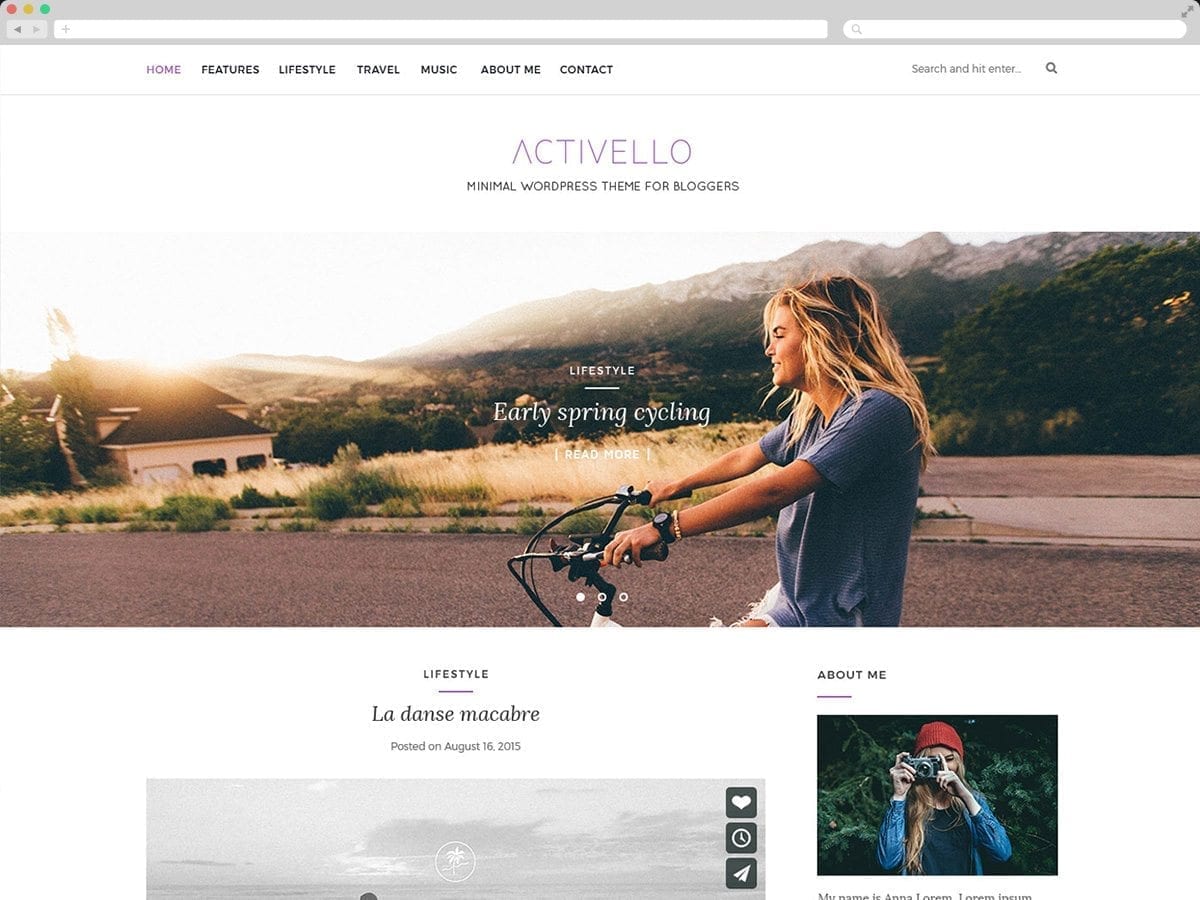
- Activello by ColorLib
- Parallax One
- Zerif Lite
- Llorix One Lite
[/bullet_block]
 You can definitely run with any of these options and the last four will provide with the option to upgrade to the premium theme version if you need to further down the track, without causing you too many headaches in the process.
This is something to consider, because changing themes might seem simple, but it’s not once you’ve got a ton of content and pages going on. So choose carefully and review your theme in three months time to make sure it’s still working for you.
Here’s my top five premium themes:
[bullet_block style=”size-16″ small_icon=”11.png” width=”” alignment=”center”]
- OptimizePress 2 (this is what I use)
- Avada on ThemeForest
- Divi on ColorLib
- Kate Marcado on Creative Market
- Enfold on ThemeForest
[/bullet_block]
These range in price from $11 to $99, so you can find one that suits your budget and needs. I personally use OptimizePress 2 and I love it. It allows me to create beautiful landing pages, membership pages plus so much more through the drag and drop page builder. There is a lot of customisation as well. With the $99 price point, you get three licenses, which means you can run the theme on three separate sites.
When thinking about what sort of theme to choose, consider the following and make sure you check out the demo’s to make sure they do what they say they can do:
[bullet_block style=”size-16″ small_icon=”15.png” width=”” alignment=”center”]
- Is the theme updated often? When was it last updated?
- How feature-heavy is the theme? Too many bells and whistles can lead to slow page loading speeds.
- What does the final product look like? Is it easy to navigate? Will your readers like it?
- Is the theme responsive? You’ll need a responsive theme to make sure it works across all browsers, operating systems and devices.
- Ease of use. Once you’re inside, can you easily navigate around the theme and make the customisations you want, such as adding your logo, banners etc.
- How secure is the theme? When buying from sites like ThemeForest and Creative Market, themes are rated, so you’ll quickly be able to tell if there are ones that have security loopholes.
[/bullet_block]
Now that you’ve chosen your theme, it’s time to install it on your blog. To do this you’ll need to log into your wp-admin panel.
You should have this information from when you installed WordPress on your hosting provider. The link will look like this: www.yourdomain.com/wp-admin.
Using your username and password, login. If you’ve purchased a premium theme or downloaded the free theme, you should have a zip file. This is what you’ll want to upload to your WordPress site via the “Appearance” area.
The video below is a quick tutorial on how to add a theme to your website:
[video_player type=”youtube” width=”853″ height=”480″ align=”center” margin_top=”0″ margin_bottom=”20″]aHR0cHM6Ly95b3V0dS5iZS9oZVZSZHRPYzZyQQ==[/video_player]
Once you’ve got your theme installed, go ahead and customise it by adding your logo and site name details. Use your theme’s documentation to walk you through what you need to do and if you have any issues, reach out to the site where you grabbed the theme from for additional support.
Before we move onto the bare minimum pages, let’s check out some other areas on your site that you should tweak to make sure your site works well for you.
[video_player type=”youtube” width=”853″ height=”480″ align=”center” margin_top=”0″ margin_bottom=”20″]aHR0cHM6Ly95b3V0dS5iZS9aeGtTUDBkNWVRQQ==[/video_player]
Ok, now you should be well and truly set up with your WordPress site and theme, let’s move onto what pages you should have on your site at a bare minimum…
#3: Pages on Your Site
No matter what type of side hustle business your running, there are some key pages that your site is going to need. These are as follows:
[bullet_block style=”size-16″ small_icon=”15.png” width=”” alignment=”center”]
- Contact page
- About page
- Terms of Services page
- Privacy page
[/bullet_block]
The first page is your contact page. Most people who are browsing your site, will want to know how they can contact you if they have a question or if they want to get featured on your site, etc.
You can use a plugin like Contact Form 7 to manage this process for you, or simply include your contact email address. You could also include your social media accounts on this page too, encouraging people to reach you on these platforms too.
The next is your about page. This is where you should tell a personal story about you and then talk about the business itself. Be personable and tell a story, show people who you are and they’ll connect with you, which leads to a burgeoning relationship.
At the very least, you should also have a TOS page and a privacy page. You can get these autogenerated from online sites or you can chat with your lawyer about having something drafted that is more specific to your business.
It’s important that you have these pages on your site, because it means you take your side business seriously and that you value your readers, target audience etc.
Beyond these pages, you’ll have landing pages, product pages, services pages etc, whatever is relevant to your side business. Set these up before you start posting to your blog, so that you can link back to these pages as needed.
The final step in setting up your WordPress site for success is making sure you have the right plugins installed.
#4: WordPress Plugins
WordPress plugins provide a powerful way for you to further customise your site and they also provide ways for you to protect your site.
Below is a list of the WordPress plugins I recommend you install on your site:
[bullet_block style=”size-16″ small_icon=”11.png” width=”” alignment=”center”]
- BackupBuddy
- Yoast SEO
- Jetpack by WordPress
- SumoMe
- Pretty Link
- Akismet
[/bullet_block]
 These plugins literally provide all you need to make your WordPress site hum. Most of them are free (or have free options) aside from Akismet.
Akismet is probably one of the most important plugins you should implement because it controls comment spam. It will make your life so much easier, so definitely pay to activate this on your site.
BackupBuddy (or Updraft Backup) will ensure that your WordPress site is always backed up so that if anything happens and your site crashes, you can install it from the last backup. If you’re posting on your blog more than twice a week, I’d recommend that you backup daily.
YOUR ACTION STEP:
Starting a side hustle is easy, getting the word out and showcasing what you’ve got is a little more difficult. By setting up your WordPress site for success, you are now in a position to start sending traffic to your site and interacting with your readers. You’ll also be able to attract the right clients too.
5 replies to "How to Set Your WordPress Website up for Success"
[…] you’re just starting out in your side hustle, you might not have been able to do this just yet, but I’d encourage you to do it as soon as […]
[…] you want to kick things off with a bang, show your worth. Start your own personal website that showcases your work, increase your social media presence and write on your blog about your […]
[…] last part was eased a little when I switched to OptimizePress as my blog theme and used their forms instead, but I still had to set up that welcome email […]
[…] can be hosted on your own domain and it is a great combination of providing you with a platform for both a portfolio plus a blog to showcase how awesome you […]
[…] Many of you reading this are bloggers yourselves. So why not take inspiration from Automaticc? They’re the company that created and runs the internet’s largest blogging platform—Wordpress. WordPress powers this site, over a quarter of the internet, and if you’ve been taking Lise’s advice it runs your site too. […]