
Table of Contents
Let me preface this by saying that this is one loooong post. If you don’t have time to read it now, save the pin to read later. Or make sure you save it to Evernote and read at your own leisure…
Note: This post was originally published in 2016 and has been updated with new info for 2021.
At the beginning of 2016, I set down some goals for this blog and my business. Part of that included rebranding and renaming the site aka changing domain names.
What I thought would be a relatively easy process, turned into somewhat of a nightmare, one that I feel could have been avoided if there was enough information available to make the right decisions in the first place… but there wasn’t.
So I had to make decisions based on the information available, which I’ll tell you about in a second.
First, let me give you a bit of a background on why the change:
I started this blog back in late 2013, about 18 months after I quit my day job to go full time in my side hustle as a freelance writer.
At the time, I was focused on working on sites like Upwork (formerly oDesk), finding clients and projects there to work on.
Obviously, both of these things have changed and I’m no longer focused just on outsourcing sites like Upwork.
I’ve also changed directions a couple of times in the past two years, having started self-publishing back in July 2014 and coaching people to figure out their own side hustle dreams.
Once I sat down and did my annual review in December of 2015, I realized that the previous name of this site, Outsourced Freelancing Success, didn’t really represent what I wanted to do going forward.

So I was faced with a decision… start a whole new website or rebrand and change the domain of the existing site.
Because the content that’s on the existing site was still going to be relevant to my future plans, I decided to go with a rebrand and domain change… as well as changing hosts too, because if you’re gonna do something drastic, you may as well go the whole way!
Ok, now we’ve got the backstory, let’s step through the process from start to finish…
Rebranding Your Site + Domain Name Change 101
#1: Domain Name
The first thing I needed to do was decide on a new domain name. I initially thought that something round side hustle would make a lot of sense, but I also didn’t want to step on the toes of people like Nick Loper of Side Hustle Nation (if you haven’t been and checked out his site, you need to do that NOW!).
I started out by setting a time for 15 minutes and just writing down all the different brand names I could think of that might work for the direction I wanted to take the site in.
I cannot for the life of me find that piece of paper, but I know I narrowed it down to three options.
From there, I jumped on godaddy.com to check if the .com version’s were available. A bit fat NO was the answer to that.
I really struggle to come up with domain names and book titles, so I usually rely on a couple of resources to help me with this process, after I’ve done the initial brainstorming.
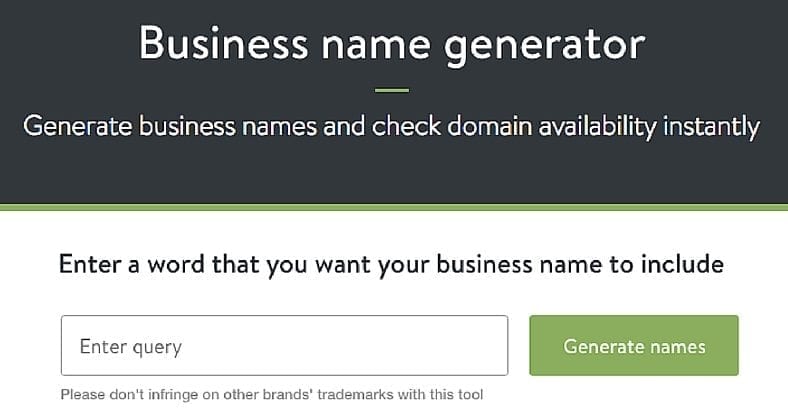 In this instance, I used the Business Name Generator provided by Shopify. The best part about using this tool is that it tells you whether the .com domain is available.
I tried a variation of side hustle and other keywords and finally landed on the next three options:
- Option #1: Side Hustle Haven
- Option #2: Hustle & Groove
- Option #3: Freelance Side Hustle
Once I had these names, I wanted to see what others thought. I put it to my current newsletter list and I also sought feedback from my Facebook friends.
I already had a fairly good idea what option I wanted to go with, but I was interested to see what others thought too.
[feature_box style=”2″ only_advanced=”There%20are%20no%20title%20options%20for%20the%20choosen%20style” alignment=”center”]
Side Note: Before asking for feedback on anything like this, such as a domain name, book title, graphic etc, you should already be 85% sure of the option YOU would go with. This exercise is only to confirm or reject what you’re thinking!
[/feature_box]
In the end, my favourite option was one of the front runners, so it confirmed to me that it was the one to go with.
#2: New Host
I have been a huge fan of Hostgator ever since I started my first website back in 2011 during the 30 Day Challenge (now called The Challenge). And while Hostgator have been nothing but awesome, I knew that I would need a service provider with a little bit… well more.
I asked for recommendations from online friends. It pays to get referrals when it comes to hosting. You can end up landing yourself in a bit of a pickle if you choose the wrong company.
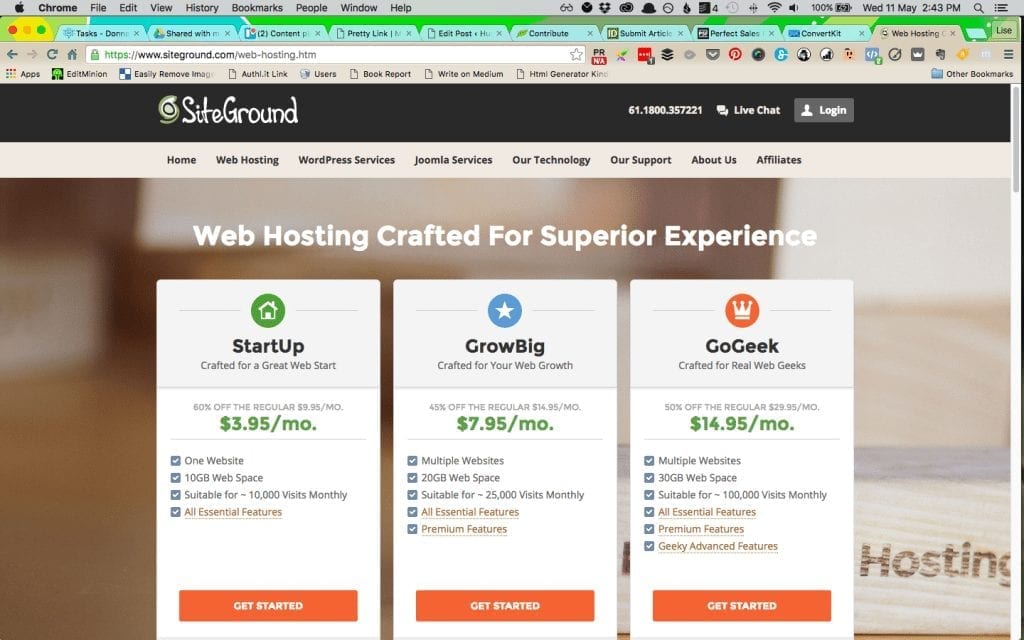
The name that kept coming up the most was Siteground. Once I reviewed their site, I was hooked. I loved that they were providing options specifically for WordPress sites and that they provided a free site migration service… which would have been the best option to go with, had I thought things through a bit more…
I decided to keep the remainder of my websites on Hostgator and just put my new site with Siteground. It pays to spread the risk, right?
The pricing is also pretty great at Siteground. So if you’re in the market to change your hosting provider, definitely check out Siteground.
Before we move on, it’s important to note that at this stage, I hadn’t moved a thing. Everything was still business as usual over at the old site.
You can already see that there are a lot of moving pieces just to get to the point of the actual rebrand and hosting move. Make sure that you take your time as well.
I gave myself a good two months and it still wasn’t long enough!
#3: Rebranding
Because I was keeping my website the same in terms of theme and content and just changing the branding logo and colours, this part of the process was by far the easiest.
I have a WordPress site using the OptimizePress3 theme, which I absolutely love! OptimizePress allows me to customize so many things. I use their SmartTheme for the blog itself and OptimizePress3 for any stand-alone pages and landing pages. So all I really needed to do was figure out my colours and what I was doing for a logo.
I started out on Pinterest, looking at different colour swatches to see what sets of colours worked well together. I was looking for bright colours, because I wanted the new site to reflect how bright my personality is ?.
These are some of the contenders I looked at when deciding on the site colours:

And here’s the final colour palette I actually went with (which has since changed, I love so many colours!):

Once I had the colours sorted, it was time to get the logo created.
I knew that I wanted a brush script type of font, but beyond that, I had no idea what I should have. So I jumped on Fiverr and messaged a few people. I finally landed on someone who could provide me with some concepts at a reasonable price.
Once I had a few options, I again presented these ideas to my newsletter list and also to my Facebook friends.
Below you can see the four options I had available. Once again, I had an idea of the one I liked the most:
![]()
As you can see, in the end, I went with a couple of variations.
Side note: In 2019, I’ve updated the logo slightly (gotta keep it fresh!) and now it looks like this:
Side note 2: In 2020, I changed the logo slightly again… and now it looks like this:
![]()
I got some great feedback from my newsletter list. One of my subscribers, who is a graphic designer, reached out and offered to tweak it further! It was a great process and I’m extremely happy with the end result.
Now we’ve arrived at the pointy end of the process… the next few steps (and story) will be focused on moving the site and changing domains. I’ll do my best not to get technical and link to more definitions if I have to…
#4: Site Preparation
Now that I had all the rebranding stuff in place, it was time to prepare the site. There were a number of things that I just didn’t know I didn’t know… like 301 redirects and what to do with WordPress plugins like Pretty Link.
I also hadn’t considered the fact that because I’m using an OptimizePress site, all of my landing pages would also need to be redirected. Not to mention all of the deep linking I’d already done within my blog posts.
Honestly, when I got to this point, I almost threw my hands up in the air and said, “it’s just too hard!”
And it is. Which is why you should turn around and pay an expert to do all of this for you… of course, being me, I choose not to do that (initially) because I’m all about doing things myself. I have a fairly good technical understanding of how a site works etc…
I’m sure you can guess why things went wrong, lol!
Anyway, here’s a quick list of what I needed to do to get the site ready for the switch over to the new domain:
[bullet_block style=”size-16″ small_icon=”16.png” width=”” alignment=”center”]
- Download a list of all the pages and blog post URLs
- Setup the domain on the new hosting platform (Siteground)
- Review any custom CSS coding that had been applied to the blog and individual pages (make a note of these to for reviewing on the new site to make sure they work)
- A list of all the Pretty Link URLs that had been created
[/bullet_block]
While this might seem like a small list, there are a ton of things that you’ll need to do inside each item. It was at this point that I turned to Google for help.
I found a few blog posts on how to do what I needed to do… and it was also at this point that I thought I could do this — I know how to follow instructions after all…
Here’s the blog posts I used to guide me through the site preparation and the move:
#1: The simple guide to moving your WordPress site to a new domain by Neil Patel
#2: 301 Redirects for SEO: Everything You Need to Know by Joshua Hardwick (updated for 2019!).
Honestly, after reading these two blog posts, I was pretty confident that I’d be able to do this, but I wanted to hedge my bets, so I reached out to a friend from Location Rebel to help me as well.
He was kind enough to jump on a Skype call on D-Day and walk through all of this. His name is Matt Koenig and he runs a company called MK Web Development, so if you need help with setting up your site, definitely check him out and tell him that I sent you!
Matt also recommended the plugin “BackupBuddy” because it would allow me to restore to the new domain name on the new hosting plan very easily and Matt thought he understood all the htaccess file stuff mentioned in the blog posts above.
What could go wrong, right?
What Went Wrong and How You Can Avoid Doing the Same!
 The next part is going to be a full-blown recount of the day…
D-Day was April 1, 2016 US time, but April 2, 2016 my time (Australia). Matt and I had shared several emails over the previous week about what needed to be done, namely getting the URLs from the old site into a Google spreadsheet and then mapping them to the new URL on the new site… a manual job that I took on that took me about 3 hours to complete.
This spreadsheet would be the basis for the 301 redirects that we assumed would be easy enough to add to the htaccess file on the day.
I provided Matt with the links to the two articles I mentioned above, and again, we were both super confident that we’d be able to do this.
Matt offered to setup the 301 redirects once I’d done the manual mapping, and I was super grateful to Matt for offering to do this, because to be honest, I just wasn’t game that I’d do it right!
Matt also has a developer’s license for BackupBuddy, so he also offered to take care of backing up the old site and installing it on the new domain — again, I can’t thank Matt enough for all his help!
Ok, so now we’re ready to go…
It’s Saturday, April 2, 2016, approx. 2pm. For Matt, it’s Friday night, April 1, 2016 and he’s just done a full days work, got home and wolfed down some dinner and is jumping on a Skype call with me!
At this stage, I’ve already added the domain to Siteground, provided Matt with access and he’s already completed the backup on the old site.
Now it’s time to install the old site on the new site… so I provide Matt with the login details and we sit there and watch as Matt uploads the backup to Dropbox and wait for it to sync… it’s a fairly large file, so it takes nearly 30 minutes to do this.
Matt and I chit-chat about things like the price of fuel here in Australia compared to the US and Matt is appalled at how much we have to pay here! As a side note, he is driving a large Ford pickup, which costs him approx $45 to fill. In comparison, that same pickup here in Australia would cost close to $78 USD to fill — which is why we didn’t have a car during this time ?
Ok, back to the story.
2:30pm, and we finally get the signal from Dropbox that it’s all uploaded. Matt decides that it would be better if I upload the file, so he walks me through uploading the backup file to my sites folder via cpanel.
Again, that takes another 30 minutes to happen, so while that’s going on, Matt installs BackupBuddy on the new site.
More idle chit-chat… thankfully Matt and I have plenty to talk about, otherwise this could have been VERY awkward!
Let’s do a quick time check and recap of where we’re at:
[bullet_block style=”size-16″ small_icon=”12.png” width=”” alignment=”center”]
- An hour has already passed, it’s now 3pm
- We’ve uploaded the backup from the old site to the new site via cpanel
- Matt has installed BackupBuddy on the new site aka Hustle & Groove
[/bullet_block]
Ok, back to the story…
So far, everything is going along great, there are no issues with the file upload or the BackupBuddy installation. Next up, we need to install the backup onto the new site. I let Matt take the reigns from here, for fear that I’ll royally stuff it up!
With a few clicks here and there, it takes about 10 minutes for BackupBuddy to do it’s thing and set up the new site with all the content from the old site… success!
The next thing we do is place a 301 redirect on the domain name, so that anyone visiting Outsourced Freelancing Success will automatically be redirected to www.hustleandgroove.com — that works!
At this point, I’m thinking to myself, “This is awesome! How cool are we to do this by ourselves?!”
Hmm, I think I might have spoken too soon…
Now that all of this is done, it’s time to (as Neil and Joshua mention in their blog posts above) quickly and easily implement the 301 redirects for all the pages and blog posts.
Side Note: the reason we’re doing 301 redirects for both the domain and individual pages and blog posts is to ensure I don’t lose too much SEO juice. If you just do a 301 redirect on the domain, it won’t necessarily work for all your pages and blog posts, which is why you need to do this.
This is an absolute MUST and failure to do this could see your site completely tank after the domain name change.
I’d also recommend, if you can, on activating your new domain with a “coming soon” page a few weeks prior to your scheduled go-live date. This is so that Google and other search engines know that the site is ‘alive’ and that it doesn’t treat it as a brand new site when you do go live.
Ok, back to the story…
At this stage, Matt and I have been on our Skype call for an hour and a half and I’m thinking that we’ll only be another 30 minutes, because really, all that’s left to do is update the htaccess file, right?
Yeah well, this is where things start to go a little awry…
Matt and I have both thoroughly read the articles above, and are confident that we’ve got the right coding and have updated the htaccess file correctly. Matt goes ahead and uploads the new htaccess file, we hit refresh and… boom, nothing works!
Well, it works, but it takes us back to the old site, not the new site.
Ok, a little annoying, but we’ve got these two articles to step us through, right? So we go back to Neil’s article first, to see where we might have gone wrong, and Matt thinks it might be that we need to add .html to the end of each new URL.
A quick find and replace in Google spreadsheets and 10 minutes later, we have a new htaccess file to upload with .html added.
We hit refresh… and now instead of going to the old site, we’re getting 404 errors! I’m starting to hyperventilate and it’s now hit the 2 hour mark…
Now we start Googling the crap out of what to do and land on a plugin that handles the redirects from your old site… which then sparks a discussion on whether I need to keep the old site running… which it looks like I do if this redirect plugin is going to work.
So we install this redirection plugin on the old site. It spits out an updated htaccess file as well, which we then upload to the new site… and it doesn’t work, still 404 errors!
Then we figure out that we might need to refresh the cache on our browsers, so we do that, clearing everything to ensure that we don’t it’s not our caches that are the problem.
I also use another browser to test and start to see that some of the redirects are working but others aren’t. Matt does a bit of investigating and finds that the ones that don’t work, if he deletes them and then manually enters them, they work.
So guess what I do for the next hour or so… manually check over 400 links.
Then I discover something else… all those Pretty Links I’d set up, they now no longer work and I have to do 301 redirects for those as well!
Matt and I work together on that and discover I need to upgrade to the pro version of PL in order to get a list of all the Pretty Link URLs… annoying but has to be done.
We add this list to the redirection plugin and find that a lot of the links don’t work either… at this stage, Matt and I have been on Skype for just over 4 hours.
It’s midnight for Matt, so I let him know that I’ll take it from here… because the main site is working, most of the 301 redirects are working, now it’s just a bunch of manual checking and updating.
Here’s a quick recap of what we did and what plugins/tools we used:
[bullet_block style=”size-16″ small_icon=”12.png” width=”” alignment=”center”]
- Installed the new domain on Siteground
- Installed BackupBuddy on the new site and then uploaded the backup from the old site to the new site and used BackupBuddy to install onto the new site
- Uploaded an updated htaccess file based on the two blog posts mentioned above. This didn’t work
- Plugin: BackupBuddy for installing old site onto new site
- Plugin: List URLs to grab a list of the old site URLs, I used this to generate the Google spreadsheet and then just did a find and replace with the new site details to get updated URLS
- Plugin: Redirection to manage all the 301 redirects on the old site (it was installed on the old site, not the new site)
[/bullet_block]
After all that’s said and done, the only thing that worked from those two articles was the BackupBuddy recommendation and the Redirection plugin. The htaccess file stuff just didn’t work, even though both Matt and I followed their instructions down to a ‘T’.
What Happened Afterwards
In the days following the new site setup, I noticed that I was getting a ton of 404 notifications from the new website. Rather than Google and waste time trying to figure this all out, I bit the bullet and reached out to a friend of a friend who’d been recommended to me.
Full disclosure: I should have used Grayson to manage the WHOLE process, rather than bringing him on at the end.
Grayson Bell was very gracious in helping me, he never once said, “you should have used me right from the start!”
Grayson was able to fix a few things for me and tweak the new site, as it was running extremely slow. We discovered that some of the plugins just weren’t working, so Grayson had to uninstall and reinstall a bunch of those.
Grayson was very competitively priced, it only cost me close to $200 USD to get his help. You can check out Grayson by visiting his website here: www.imarkinteractive.com
I also ended up installing another plugin on my new site called “Broken Link Checker” so that I could identify any other links that hadn’t been captured.
What I found out was that a lot of external links weren’t working…
The reason? I hadn’t included http:// in the links. This is SEO 101 best practice and something you should do for all external links.
There were also some that needed updating because the website was no longer running or they’d updated the permalink structure of their website and people were getting 404 error messages rather than the article I was linking too.
I’ve kept this plugin on my site to make sure that I pick any of these up in the future. I have also added it to my quarterly website review process.
Key Takeaways
If you’re looking to rebrand your site, change domains, and keep your old content, then don’t do what I did. Don’t attempt to do this yourself.
What should you do instead? Reach out to someone like Grayson and get them to do this for you. It’s less stress and you won’t waste 10+ hours trying to get things fixed.
If you don’t have the funds, then make sure you read, test and read again before attempting to do this for yourself. And make sure you have a tech buddy on hand, like I did with Matt. That way you can at least troubleshoot and work things through to get the site 90% operational.
Rebranding and changing your domain name is a great idea if you’re looking to move in a new direction with your site. In hindsight, I’m not sure that I could have approached this any other way. Yes, I could have just done a 301 redirect from the new domain name to the old site and left everything sitting there, but this is how they would have looked:
Step #1: Person clicks on www.hustleandgroove.com
Step #2: The 301 domain redirect kicks in and takes them to www.outsourcedfreelancingsuccess.com. This site is rebranded as Hustle & Groove, but the domain remains www.outsourcedfreelancingsuccess.com
Step #3: All resulting blog posts created still have the old domain name, even though I could install the redirection plugin and have them all updated to be hustleandgroove.com/blogpostname
Result: Messy.
This is why I went through the pain of moving everything to the new domain so that I could have everything reflect the new direction I wanted to go.
Learn from my mistakes and don’t attempt to do this for yourself unless you’ve got good stress management processes in place!
In hindsight, I definitely would have outsourced this to someone else, but at the time I wanted to just get it done and didn’t want to wait.
Don’t attempt to do this if you have zero tech skills! You will stuff something up… and end up paying way more money to fix it.
14 replies to "What NOT to do When Rebranding Your Site (Checklist Included)"
[…] preference) is that if you choose a domain name now and build your site, it’s bloody difficult to rename (rebrand) it further down the […]
[…] used this when I rebranded Hustle & Groove — so helpful and it generates more ideas than you can think of on your […]
[…] You can learn about the process I took to rebrand this website from ‘Outsourced Freelancing Success’ to Hustle & Groove here. […]
[…] I did rebrand Hustle and Groove, but that wasn’t planned at all! That was a very last minute decision that took 6 weeks to […]
Oh my goodness girl that is quite the list of rebranding, renaming Lise!!!! I got exhausted thinking of those steps:). Thank you so much for sharing your experience and all your wonderful tips. I’m in process of trying to figure out if I should rebrand & rename my site or just start a new one. My site that I have I haven’t been posting or updating in a couple years but it’s kind of like my “baby” that I’m having a hard time letting it go. Lol. I worked so hard on it but it’s not current or modern like I’d like and it doesn’t represent where I’m going with it. I have a WordPress account now too if intimidates me so much. My old website is through Weebly but that was my dumb down version of how to do my own site. Again, Thanks so much for sharing! So cool you’re in Australia, I’ve always wanted to visit there. Maybe someday:). Have a blessed day Lise!
You’re so welcome Shannon. Good luck with your rebranding. It’s hard to make the decision, but the right one will feel right! Definitely switch to either a WordPress or Squarespace site, life will be a lot easier for you 🙂
Loved your article! Just wish I had read this before I already made all the same mistakes you did, and then some. I just stumbled across this while searching for solutions. Ugh……….. At least now I know the uphill battle I face. Thank You!
Hey Jason, oh no, I feel your pain. You got this though! Backup as often as you can!!
Man, great article, Lise! So glad I read it!
I’m used to doing everything for my site myself, and it’s been a real slog—takes an obscene amount of time, energy, and trial-and-error. All praise be to God, I’ve managed it thus far.
But it’s good to know the points where I really need to step back and scrape together enough money to call in outside help.
It also does make me glad that I’ve been following the advice from Michael Ellsberg’s book, “The Education of Millionaires,” and anchoring my brand around my name rather than any one activity I do or service I provide.
I’ve actually just been working on some amount of rebranding as I’m shifting current focus from writing to proofreading. It’s still been a fair bit of work, but it’s ultimately come down to things like tweaking existing pages and headers, plus building some new ones, rather than needing to change my entire domain name or logos across every page.
I’m definitely not saying that this is the best option for everyone, and there are definitely benefits to other approaches. But I am glad in my own case that I’ve been taking this approach.
Even so, this article is still something to keep in mind for future reference should I need it, plus I’ve already come away with something I actually do need to implement ASAP: a broken-links checker!
It’ll be great to be able to have some peace of mind and fix problems promptly rather than only being aware when I stumble across them.
Yes! Get that broken-links checker in place, it’s a lifesaver!!
What happened to your traffic after the redirect?
I have already done a redirect before 3 years ago- and Grayson actually did it. I sometimes consider rebranding again to change one word from my name (losing the mom piece because it’s not all I am/do) but still can’t decide if it’s worth it again for a traffic dip like last time and the ROI to changing everything else!
Hey Layne, gosh it was so long ago now, I can’t remember how it impacted traffic… but I do believe a slight dip happened but recovered quickly as I was blogging a lot. Honestly, Grayson was a lifesaver! My friend Matt was awesome too… but to DIY this kind of thing, you need next level skills, lol! Lesson learned.
Great tips on rebranding your site! It’s so important to stay aligned with the audience’s needs while refreshing your site. Thanks for the helpful advice.
You’re so welcome!